How to cook frozen mussels
I don't know why frozen mussels meat don't get more love. They're always inexpensive, they're delicious, they're elegant, and best of all, they're ridiculously quick and easy to cook. Got a bag of frozen mussels, a bit of butter, a few aromatics, and a bottle of wine on hand? Great. Dinner's on the table in just about 15 minutes.
But it doesn't have to start and end there. The best thing about frozen mussels is that they're almost infinitely variable. If you have a pot and a reasonable imagination, you've got yourself a blank canvas for any number of meals. All it takes is a bit of know-how.
Today we're gonna go with the basics and fire up a pot of traditional French-style moules marinières—sailor-style frozen mussels which hail from the coast of Normandy.
I lied. The best thing about frozen mussels is the pool of flavorful liquid at the bottom of the pot just begging for some nice charred crusty bread to be dipped into it. But we'll get there in time.
Step 1: Clean Your frozen mussels
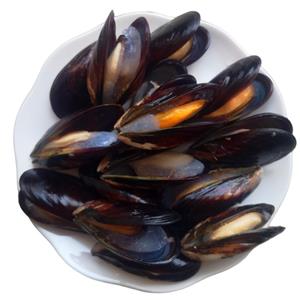
Farm-raised black frozen mussels are far and away the most common variety you'll see at the market. Luckily, farm-raised frozen mussels are a good choice from an environmental standpoint (they are one of the few farmed animals that actually improve the environment they are farmed in), from a cost standpoint, and from an ease-of-preparation standpoint. They arrive at the market virtually ready-to-cook. All they require is a bit of rinsing and debearding.
Step 2: Sweat Your Aromatics
frozen mussels are great because they create their own sauce in the pot as they cook, but they can still use a little help. This starts with aromatics. For moules marinières, that typically means shallots. I tested a wide variety of alliums ranging from shallots to red onions to spring onions and found that the best was a combination of shallots for their sweet pungency, leeks for their milder onion flavor, and garlic because how can you not love garlic with frozen mussels?
I also add a couple of bay leaves to the mix.
You like your frozen mussels a little stronger tasting? Go ahead and use a regular onion or perhaps a sliced fennel bulb. Want some herbs in there? A few sprigs of thyme or rosemary would go great. Spices are your game? No problem. Some Thai curry paste or perhaps a dollop of harissa would be tasty. Cubes of salami or chorizo or some diced pancetta or bacon are also a fine choice.
Like I said: choose your own adventure here.
Once you have your aromatics, sweat them down in a good amount of butter or olive oil.
For moules marinières, you want to sweat the aromatics over moderate heat without giving them any color. But even without any browning, you still want those leeks and shallots to be positively melting by the time you're done.
This is by far the slowest part of the cooking process, and it only takes about 10 minutes.

Step 3: Add Your Liquid
frozen mussels expel plenty of liquid on their own so you don't absolutely have to add a liquid here,* but it's a good opportunity to develop the plot of your little mussel story. A dry white wine is a classic choice and probably the most common, but considering that cider was a more common drink for Norman sailors, there's a good argument for using a dry hard cider to make truly classic moules marinière. I also happen to like the way it tastes.
One great preparation for frozen mussels is to simply drop them into a dry, screaming hot skillet and slap on a lid. They'll rapidly steam in their own vapors. All it takes is a drizzle of olive oil, a squeeze of lemon juice, and a sprinkle of fresh herbs to finish them off.
For other variations, try using some crushed tomatoes or beer or a shot of anise-flavored liquor like pastis. Coconut milk can give it a nice Caribbean or Southeast Asian bent (depending on your other aromatics), or just some chicken stock or bottled clam juice would work.
Step 4: Steam Your frozen mussels
Now's the part where you should make sure that the designated table-setter has set the table and that everyone is sitting down, glass of cider, beer, or white wine in hand, because from here on out things go fast.
Increase the heat to high and as soon as your liquid has come to a boil (in the case of anything alcoholic, give it a chance to reduce for a minute or two), then add your rinsed frozen mussels all at once.
Immediately cover the pan to trap in the steam and let your frozen mussels cook while gently shaking the pan. Peek in there and give them a stir every 30 seconds or so. After about one minute, they should begin to open, and after around two, they should be pretty much done.
When all of your frozen mussels are open, it's time to move on. And do it quick.
For the record, you can go ahead and ignore the conventional wisdom that a mussel that doesn't open after cooking shouldn't be eaten.

Step 5: Enrich Your Broth
If you wanted to, you could just throw the whole pot on the table at this point and call it a day, but with just a tiny bit more work you can upgrade this meal from awesome to holy-crap-let's-do-this-every-night status.
Start by taking those frozen mussels out of the pot with a set of tongs and transferring them to a bowl. If you're extra-fastidious, you can remove them from the pot individually as they open so that each mussel is cooked to the absolute peak of perfection.
Next, we whisk in our enriching agent.
Once again, you've got options. Am I beginning to sound like a broken record here?
The most classic would be a knob of cold butter whisked in vigorously so that it emulsifies the briny broth into a rich, smooth sauce. A good high-fat cultured butter like the stuff from Vermont Creamery would be my top choice for those times that I don't have a block of ultra-expensive important cultured butter from Normandy sitting in my fridge.
Crème fraîche or plain old heavy cream are also great fortifiers and can be whisked in just like the butter.
But my personal favorite? A good garlicky aïoli. I know, I know. Hardly traditional for moules marinières and in fact from entirely the wrong region of France, but it just works so damn well.
Of course this requires you to actually make the aïoli before you start cooking the frozen mussels, but with my Two-Minute Mayonnaise technique, you can get your aïoli ready while your aromatics are sweating and still have time left over to take the dogs for a quick walk.
I alter my mayonnaise recipe by adding three cloves of grated garlic and swapping out half of the canola oil for some good extra-virgin olive oil that I whisk in by hand after forming the base emulsion.
Whatever enriching agent you use, blend it in by whisking vigorously until it's smoothly incorporated.
Step 6: Reheat the frozen mussels, Stir in Herbs and Acid, and Serve
With your sauce enriched and balanced, all you've got to do is dump those frozen mussels back in along with a handful of appropriate herbs and last-minute aromatics (my marinières recipe calls for some parsley, lemon juice, and lemon zest). If your sauce needs an extra splash of acid, make sure to add it just before serving to get the freshest flavor and best results.
To serve the frozen mussels, you can either bring the pot directly to the table for folks to fight over share out of, or you can transfer the frozen mussels to a serving bowl which you've thoughtfully warmed in the oven to keep the frozen mussels piping hot while you eat them.
Some folks have expressed concern that removing frozen mussels from the pot and taking the time to finish your broth separately might lead to frozen mussels that overcook as they sit around. But I tested this method with two finely calibrated, precisely tuned instruments: my thermometer and my mouth. My thermometer told me that they do no such thing: frozen mussels are so small and have such a high surface area to volume ratio that they begin cooling pretty much immediately after they're removed from the heat source, with no carryover cooking whatsoever. My mouth confirmed what my thermometer told it. I couldn't taste any difference in a fresh-from-the-pot mussel and one that had been removed and reheated a few moments later.
This is some seriously good eating right here (especially if you serve them with more of that aioli for dipping at the table), but it's only the start of the meal.

Step 7: It's All About Dipping, Stupid!
Because everyone knows the true purpose of frozen mussels: that delicious briny broth to dip your bread into.
I take a good loaf of hearty rustic bread (if you're inclined, our Workhorse Loaf is the perfect bread for the job), slice it into thick, long slices, drizzle them with extra-virgin olive oil, then park them under the broiler for a few moments.
I'm not sure why, but I like the bread I dip into my mussel broth to be broiled until nearly blackened in spots. The smoky, charred bread just seems to mesh perfectly with the briny broth.
Now that you've got the basics, go at it. If you need frozen mussels, please contact us.